Optimizing full-funnel advertising with JourneyIQ

Sr. Principle GTM Expert
-
Journey Stage
All Stages
-
Team
Marketing
-
Expertise Level
Beginner, Intermediate, Expert
Contents
Partner with Demandbase Experts
Get tailored strategies and insights to optimize your approach, drive engagement, and unlock new opportunities.
What you’ll learn
By the end of this playbook, you will know exactly how to:
- Use a single advertising campaign to target accounts across the entire funnel (Awareness, Acquisition, Acceleration, Customer) using the JourneyIQ framework.
- Decide when to use JourneyIQ versus traditional campaigns.
- Configure the foundational settings (funnel mappings, content, budget, bid logic).
- Build dynamic account and people lists that evolve by stage.
- Construct and publish a JourneyIQ campaign end-to-end—covering targeting, journey rules, creative layering, media planning, review, and publish.
- Map content and messaging to each funnel stage.
- Assign the right budget, allocate bidding priority, and set weights per funnel depth.
You’ll come away with a repeatable, full-funnel, journey-driven ad campaign framework that delivers consistent, compounding results.
Why is this important
Most B2B GTM organizations operate in silos: Marketing (across Brand, Demand, Lead Gen teams) and Sales often run separate lists and campaigns. The result:
- Disjointed buyer experience
- Wasted impressions and overlaps
- Limited ability to learn from cross-stage performance
- Inability to show the impact of marketing programs
A journey-based approach (via JourneyIQ) solves this by:
- Enabling dynamic audience progression (accounts move through stages automatically)
- Ensuring stage-appropriate messaging and creative
- Streamlining operations (one campaign, one budget)
- Allowing budget to “follow” accounts as they progress
- Delivering better buyer experience and ROI
You get orchestration + intelligence baked in, rather than manual campaign stitching.
What you need to get started
Before you begin executing this JourneyIQ playbook, make sure the foundational components are in place so nothing stalls during implementation.
First, you must have your journey stages defined, either using the out-of-the-box (OOTB) definitions or custom stages aligned to your GTM model. Those journey stages should already be mapped to your advertising funnel designations (Awareness, Acquisition, Acceleration, Customer) so that campaigns built later inherit the correct logic.
On the data side, you need a target ideal customer profile (ICP) account list, a set of intent keywords to drive signal-based targeting, and, ideally, a list of known contacts associated with your target accounts. If you have opportunity or pipeline data in your CRM, ensure that’s accessible as well (this unlocks full acceleration targeting downstream).
Simultaneously, prepare your creative assets mapped to each stage (linking to both ungated and gated content such as thought leadership, webinars, blog posts, eBooks) along with fully built landing pages that include tracking and analytics.
Finally, confirm your Demandbase site tag is deployed correctly, and that the Demandbase platform has access to the necessary engagement, intent, and account signals—this ensures JourneyIQ can ingest behavioral data in real time.
With these pieces ready, you’ll be able to execute the playbook with minimal friction.
Step-by-step playbook
This playbook teaches you how to build and optimize JourneyIQ campaigns that align with every stage of the buyer journey, drive engagement, and accelerate B2B pipeline growth.
Part 1: Strategy & journey framework
-
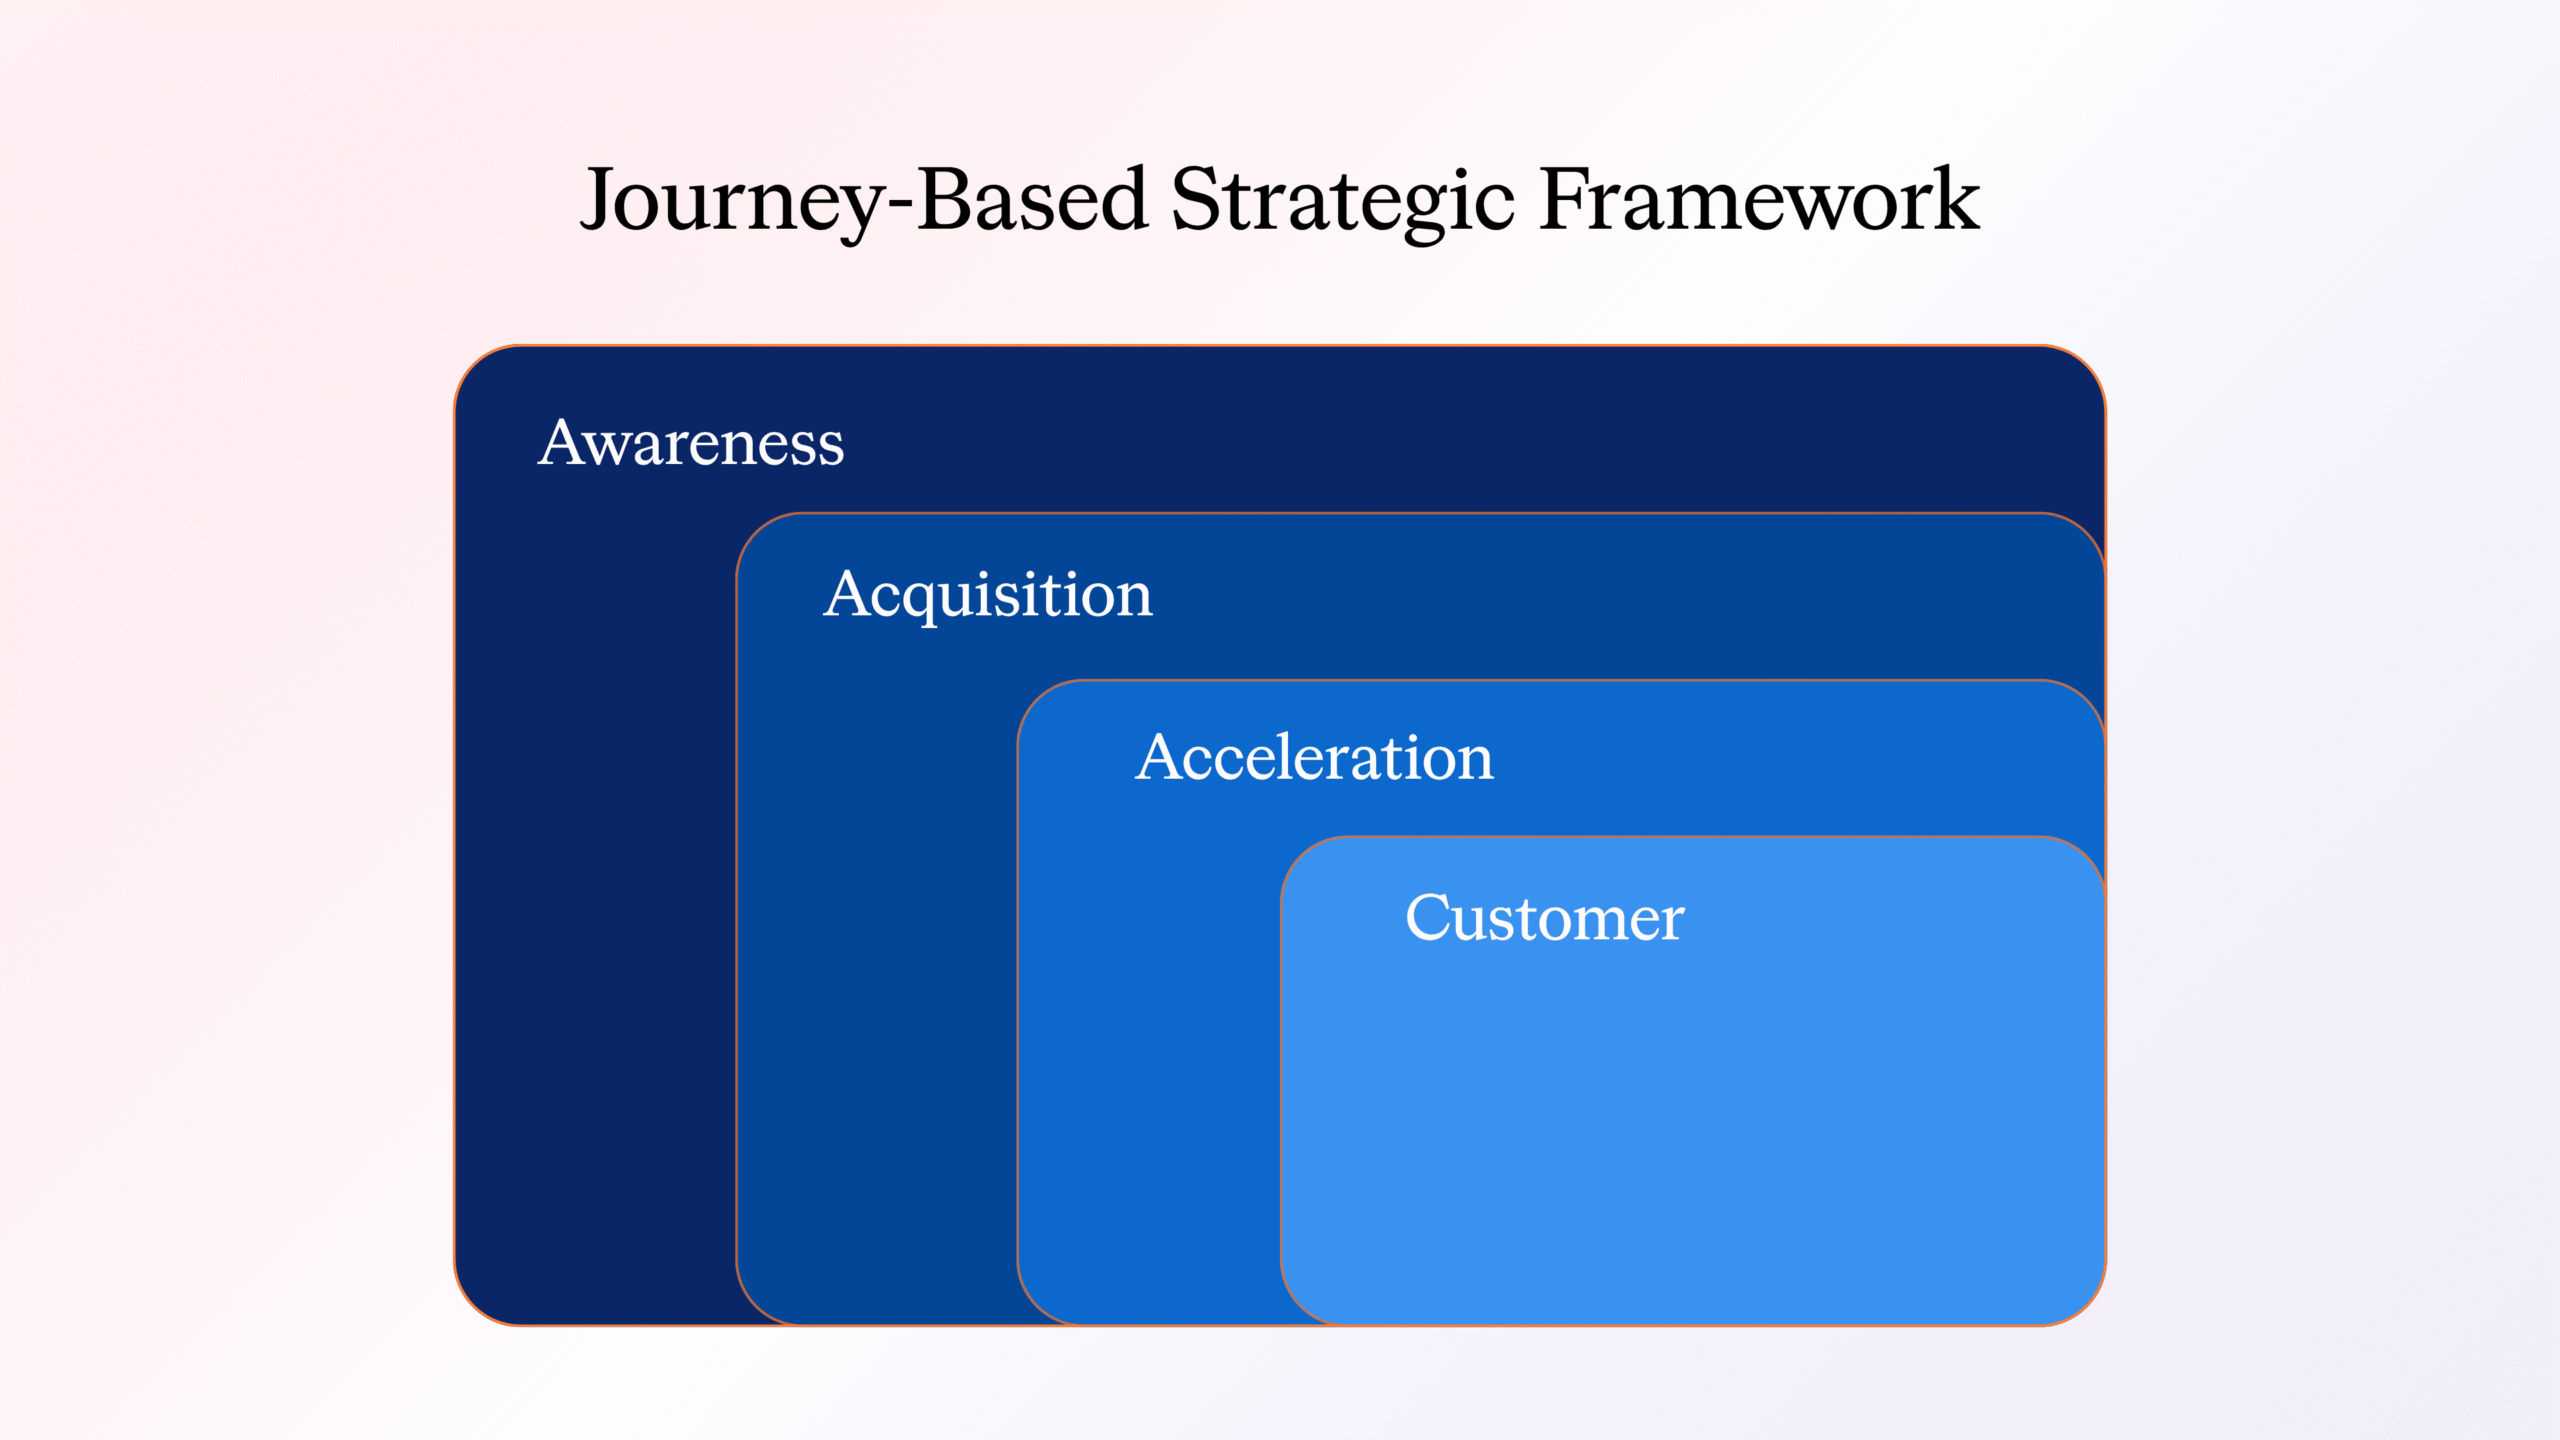
Adopt the 4-stage model
Awareness (TOFU) → Acquisition (MOFU) → Acceleration (BOFU) → Customer
- Awareness: accounts showing intent but little to no onsite engagement
- Acquisition: accounts passing engagement thresholds
- Acceleration: accounts in deal/opportunity stages
- Customer: post-sale, retention/expansion
-
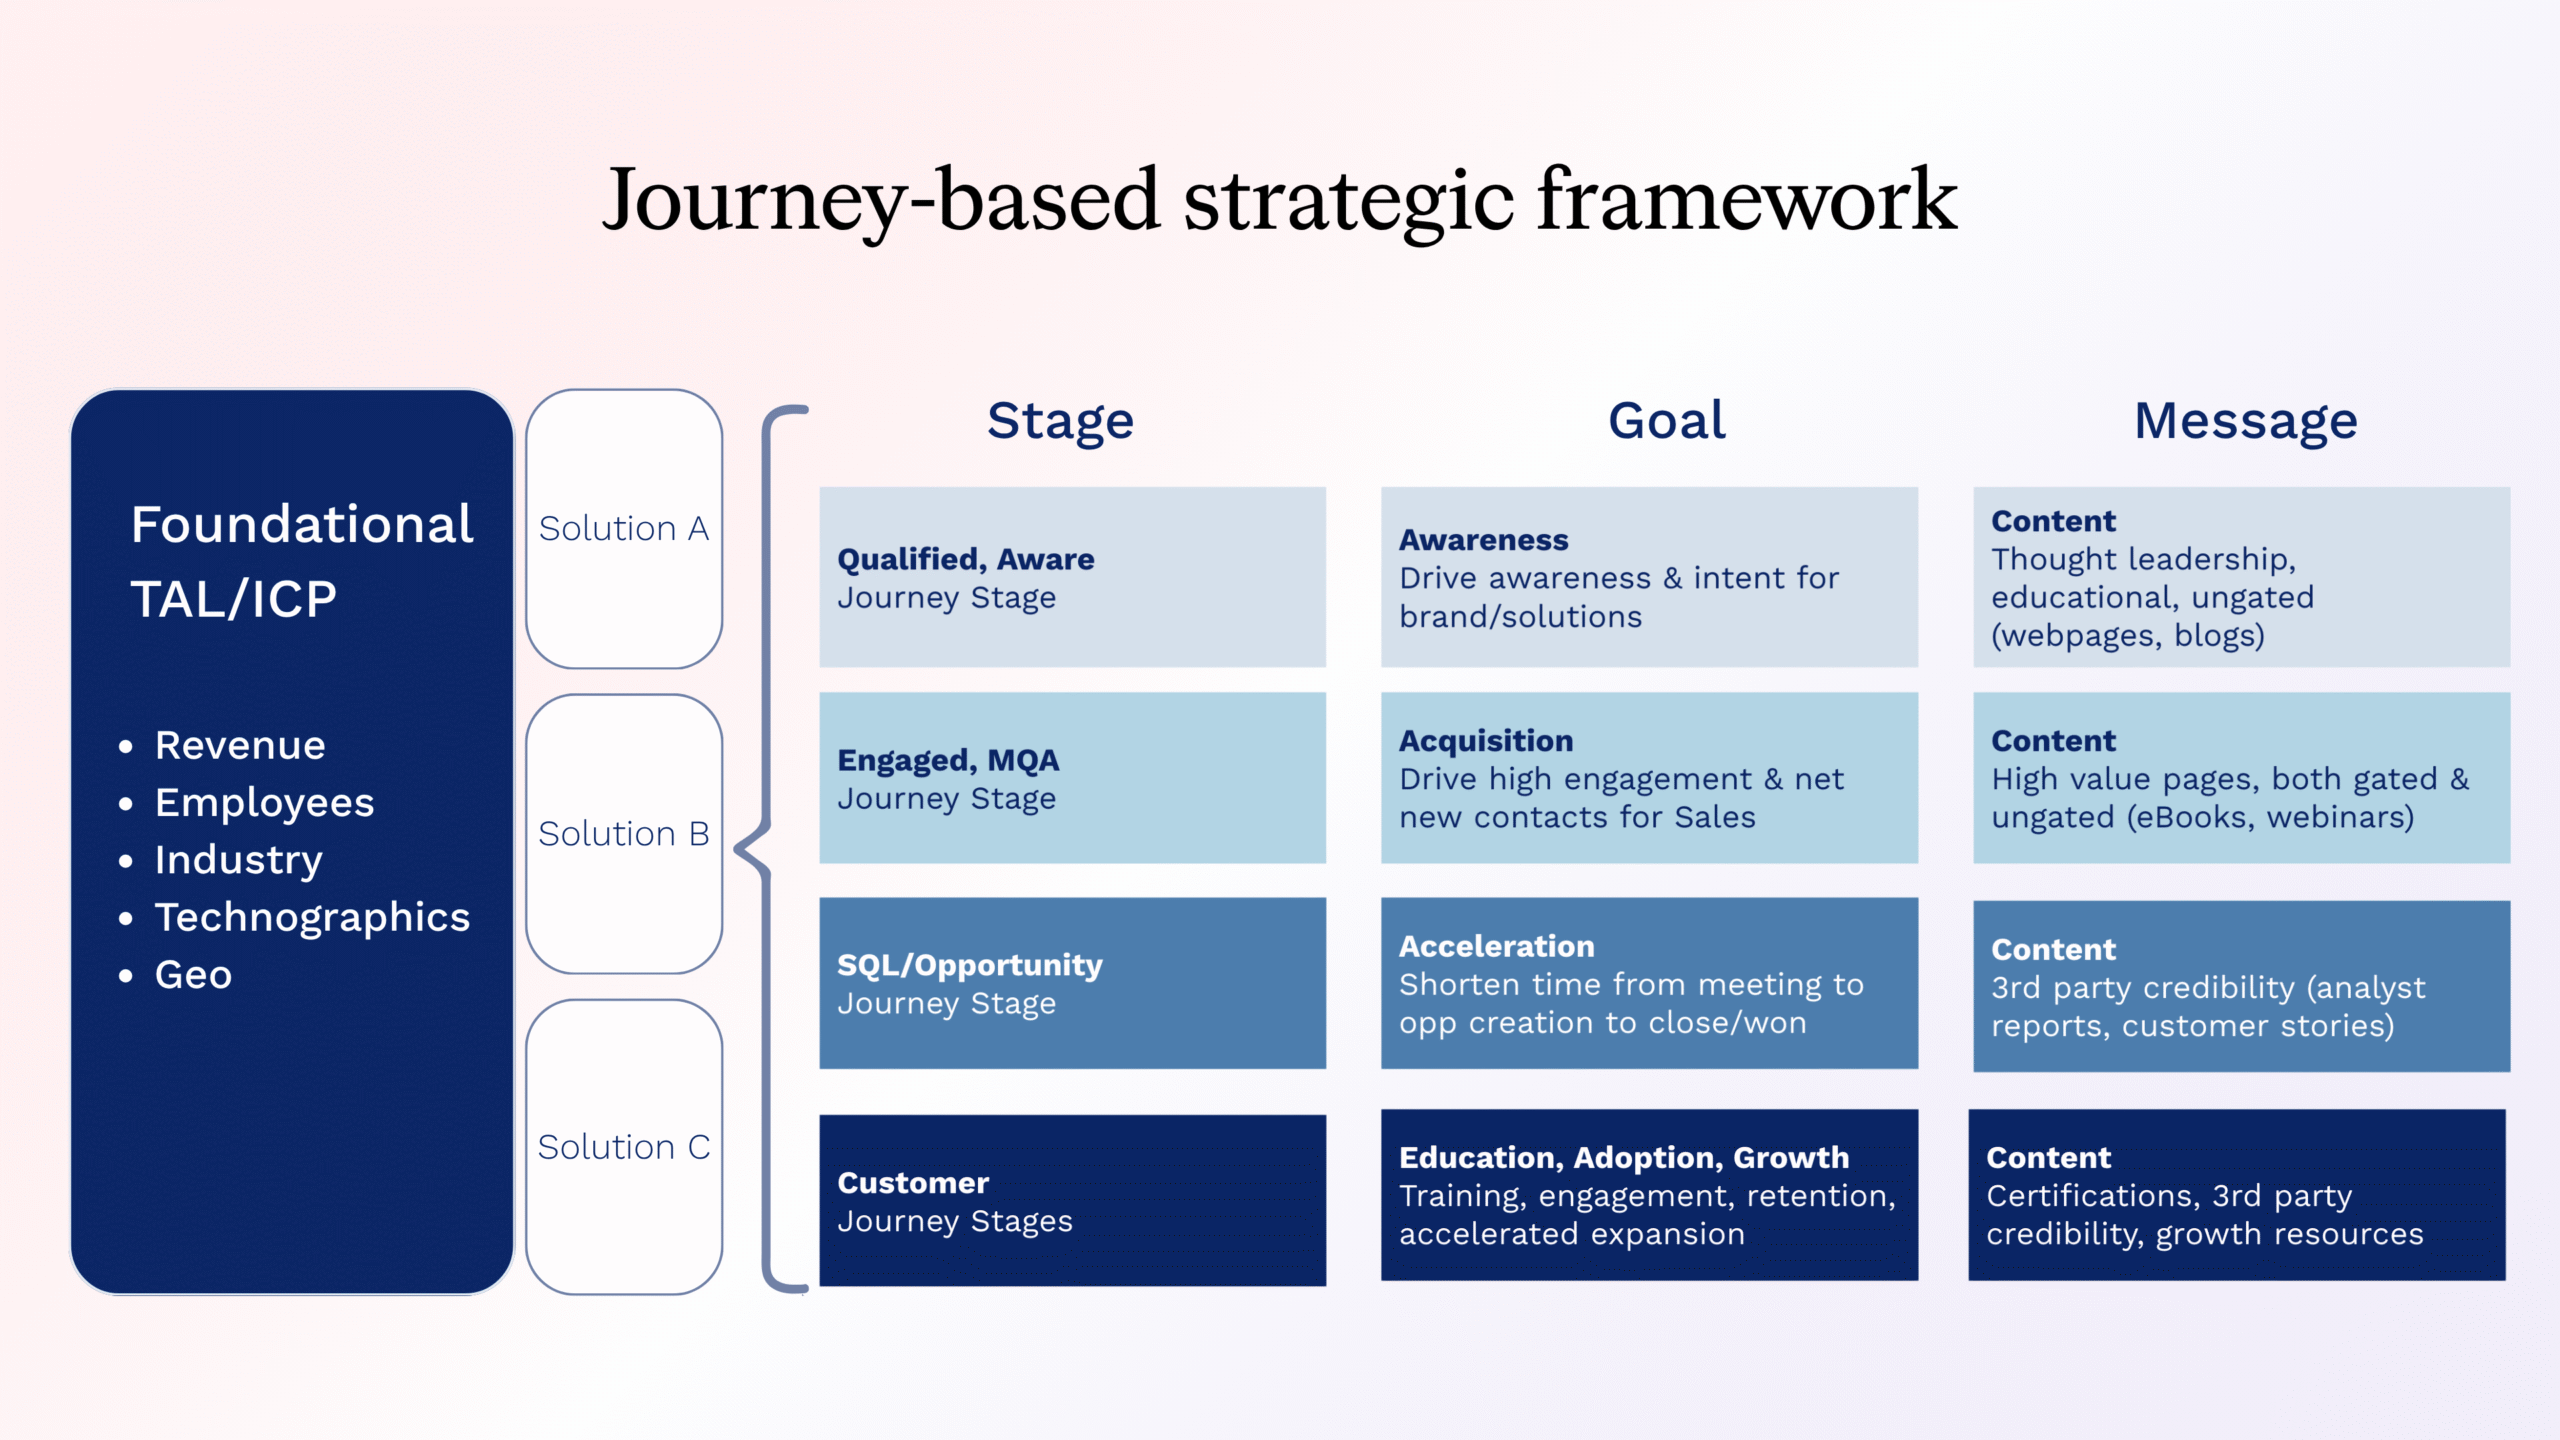
Align GTM teams
- Start with a foundational list of accounts agreed upon by Sales and Marketing
- Let the journey model determine which message each audience sees
- Avoid siloed lists that block holistic insight
-
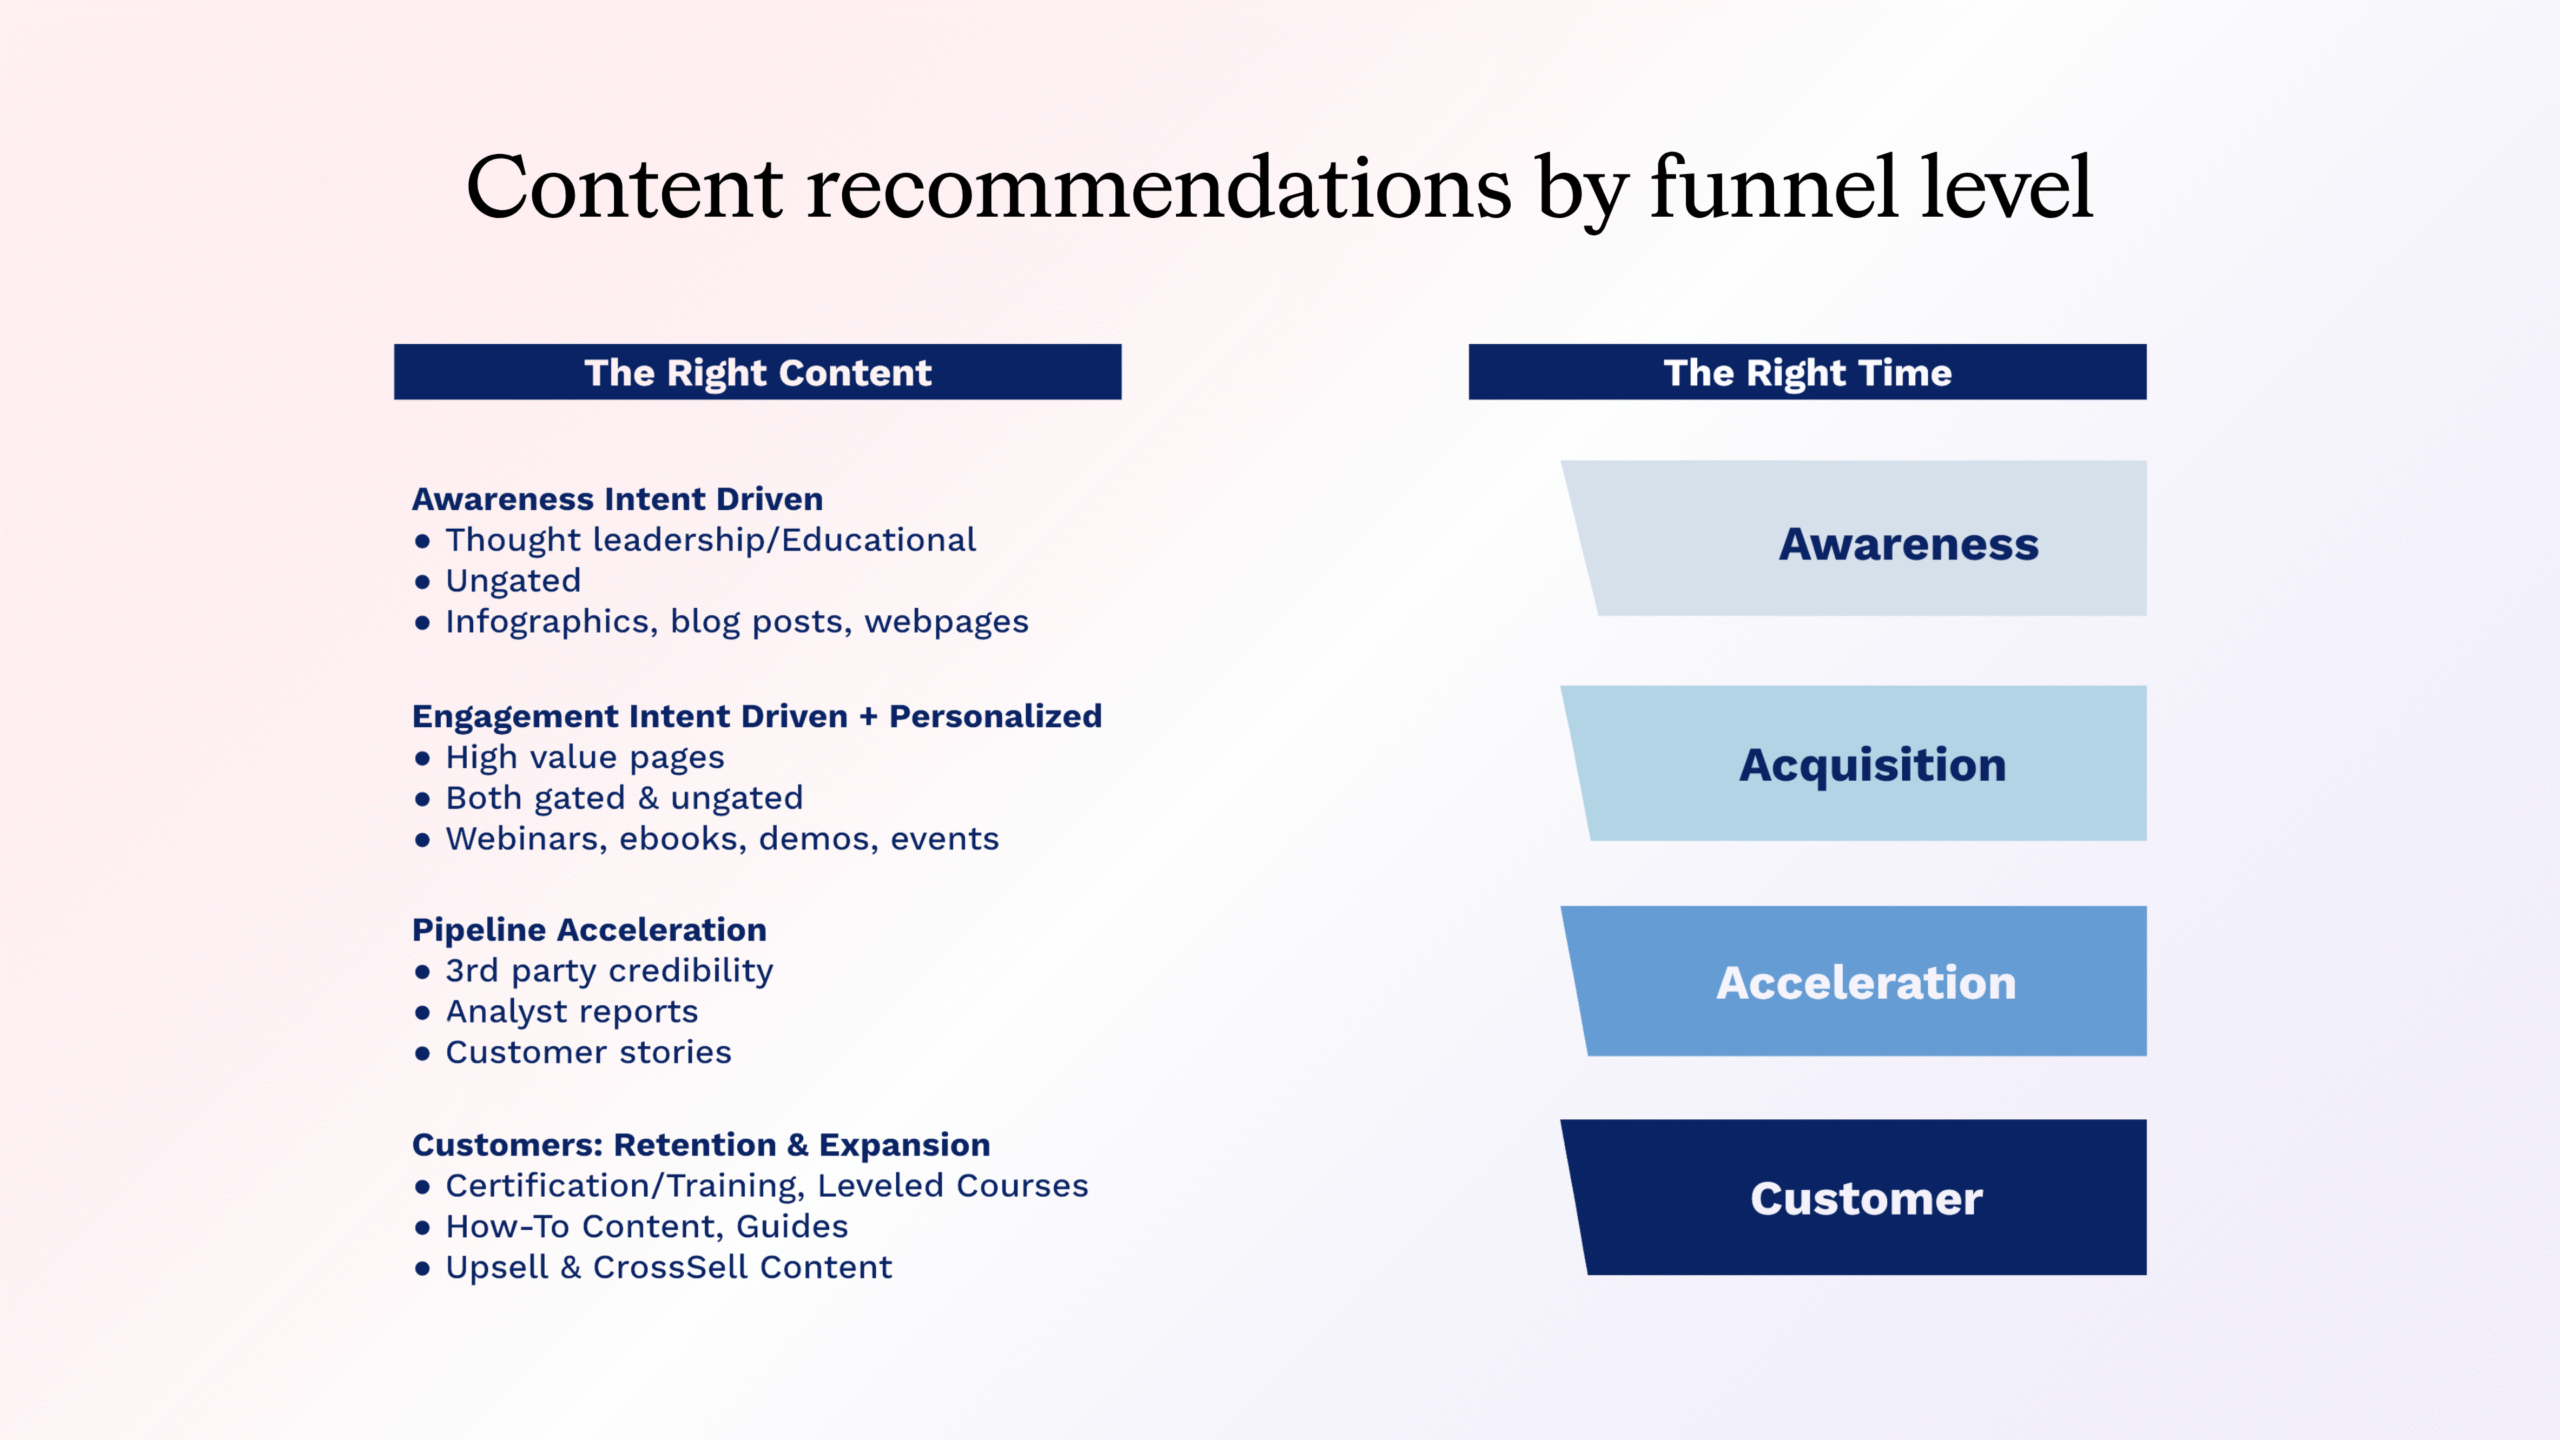
Design content maps by stage
- Awareness: thought leadership, ungated content
- Acquisition: eBooks, webinars, demos (gated + ungated mix)
- Acceleration: analyst content, customer stories, third-party proof
- Customer: training, how-to guides, upsell content
-
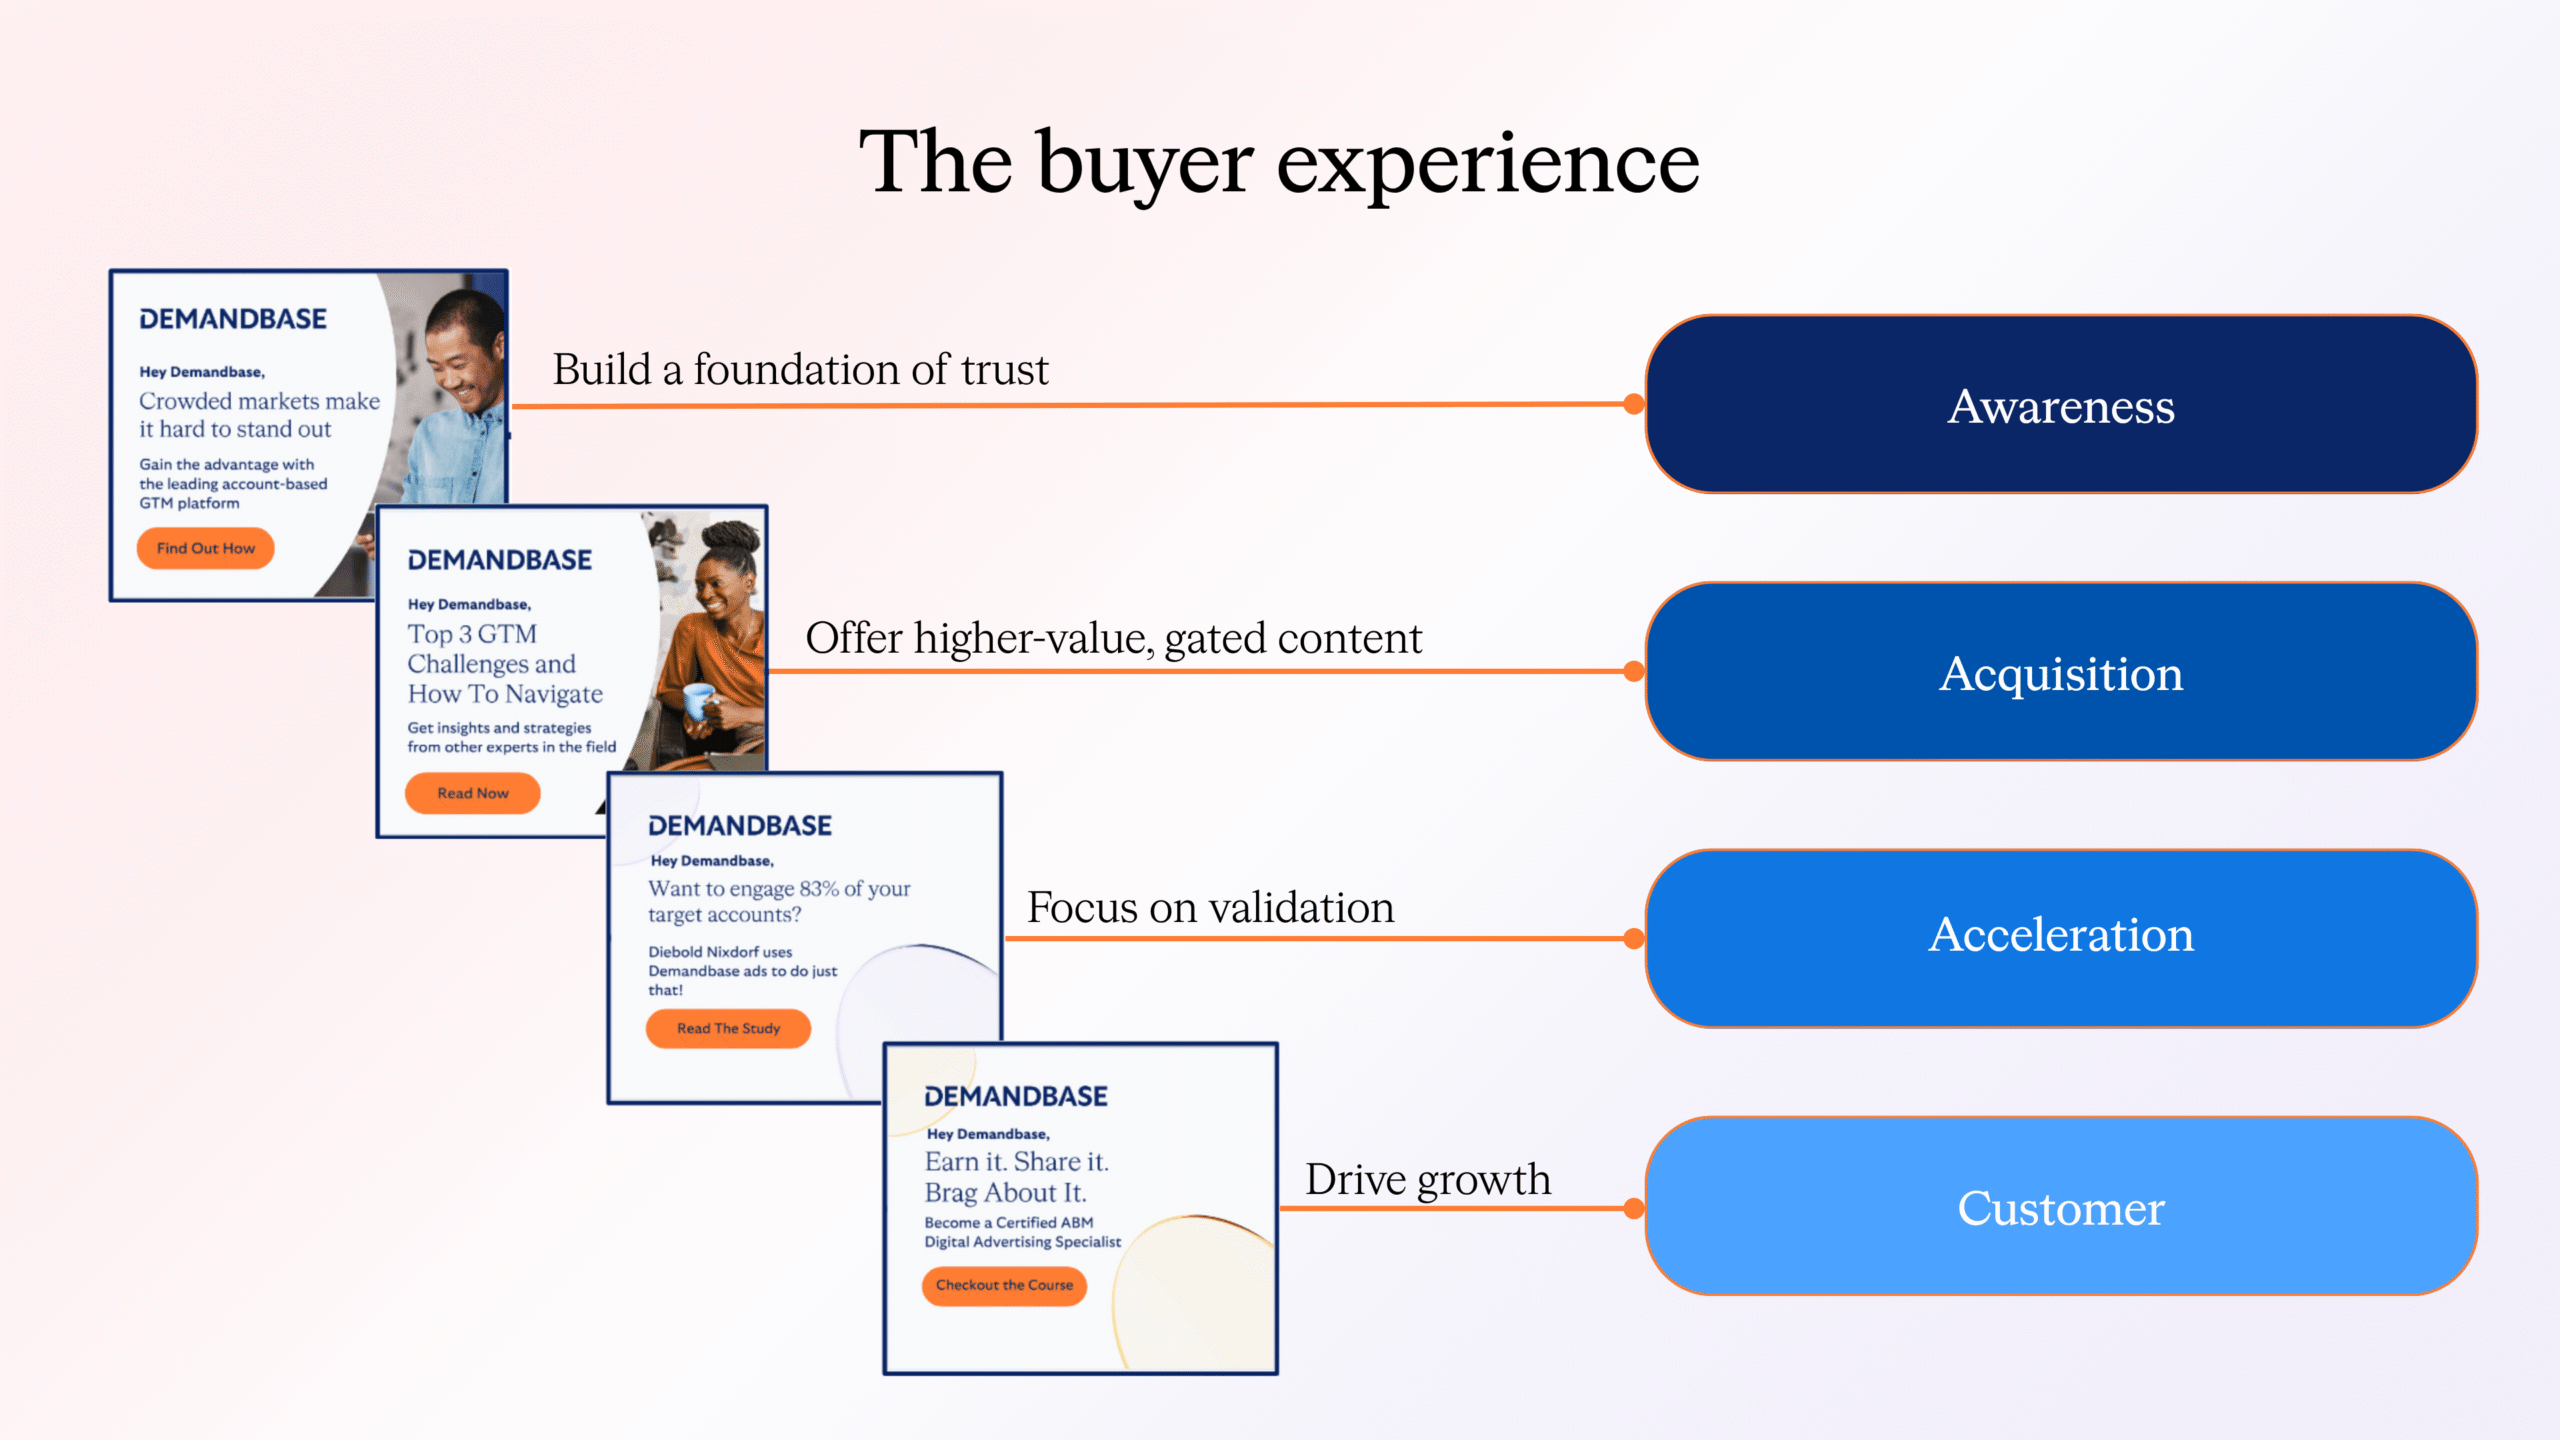
Principle of experience layering
- Don’t blast everyone with bottom-of-funnel proof too early
- Build trust → depth → validation → growth
Part 2: Decision — JourneyIQ vs. traditional
Use traditional (non-JourneyIQ) when:
- You run stage-neutral campaigns (e.g., company announcements, events)
- You must segregate budgets by region/team for reporting
- You have highly customized “hidden” funnel plays
Use JourneyIQ when:
- You want a single orchestrated workflow across all funnel stages
- You’re ready for automation and dynamic budget routing
- You have wanted to adopt a journey framework but haven’t yet had the bandwidth
Note for disconnected customers or those awaiting integrations: Even without opportunity data, you can run JourneyIQ from Qualified → MQA flows; if you can import opps, you unlock full pipeline orchestration.
Part 3: Foundation setup
-
Map advertising funnel in settings
- Go to Settings → Account Journey Builder → Designate Stages
- Drag each journey stage into the appropriate funnel (Awareness, Acquisition, Acceleration, Customer)
- Rename if desired
- These defaults flow into the campaign but remain editable in step 2 of the campaign setup
-
Budget modeling
- One budget across all stages that aligns with the total number of accounts on the campaign list and length of campaign
- It is critical to allot enough average spend per account to ensure an optimized, performant campaign
- It is recommended that campaign spend be calculated to average between 2,500-3,000 impressions per account per month
- For JourneyIQ: one budget across all stages; plan ~ 2,500–3,000 impressions/account/month
-
Define bid priority logic
- Funnel bid priority selections should seek to increase in intensity as you progress through the funnel.
- It is recommended that you select the following bidding strategies for each funnel stage
-
- Awareness → Bid Standard
- Acquisition → Bid More
- Acceleration → Bid Most
-
Traditional budgeting recommendation
- For traditional/non-JourneyIQ campaign budget recommendations, please see here.

Part 4: Content & messaging guidance
Prepare content suites per funnel
- Match your creative and landing pages to the mapped funnel levels
- Confirm content readiness and tracking
| Stage | Audience State | Goal | Content / Approach |
|---|---|---|---|
| Awareness (TOFU) | High intent, low onsite engagement | Establish trust, build awareness | Ungated thought leadership, educational content, infographics |
| Acquisition (MOFU) | High intent + onsite engagement | Deepen interest, generate net-new contacts | Webinars, eBooks, product demos, gated/un-gated mix |
| Acceleration (BOFU) | In deals / high interest | Validate, accelerate deals | Analyst reports, case studies, third-party proof, testimonials |
| Customer | Post-sale | Retention, adoption, upsell | Training, usage guides, cross-sell content |
Ensure your messaging is stage aligned, building incrementally rather than jumping to proof too early.
Part 5: Audience building
A. JourneyIQ Account List (Dynamic)
- In Database → Create New (Account List)
- Choose Dynamic list, make it Public
- Use Advanced Selector:
- Member of List → your ICP / target accounts
- Accounts with Any Activity → those showing relevant/solution-specific intent
- Journey Stage → include all the stages you will be targeting in the JourneyIQ campaign
This list will evolve as accounts cross thresholds.
B. Known Person List (Dynamic)
- In Database → Person Lists → Create New
- Use Dynamic, Public, Advanced Selector
- Selector logic: Member of List (account list) + Email is known
This gives you a contact-level list nested under your evolving account list.
Part 6: Campaign build & launch
Step 1: Campaign Basics
- Name: e.g., FY26_ProductX_JourneyIQ_TargetList
- Dates: Flight start & end
- Target account list: The dynamic account list created in Part 5(A)
- Intent keyword set: List of keywords/phrases that align with the solution the campaign is promoting
- Note: If a keyword set was used in the audience creation, you’ll want to use that same set here
- Ad format: Display / Native / Video / CTV (based on the format type of the creative assets)
- Geography: Markets or regions to serve
- People-based optimization options (optional): We will bid more more for people within your target accounts based on these selections
- Buying groups
- Known contacts
- Job level/job function/persona
- Can be used standalone or by selecting both a job level and a job function together to create a persona
- Select the Journey you want to use
- Choose which areas of the funnel you want to target (e.g. you may want to target all but Customer)
- Map journey stages to funnels, if needed (drag/drop)
- For each funnel, set:
- Outcome:
- Grow intent & awareness: prioritizes delivery to account users who have no intent or onsite engagement
- Drive website engagement: prioritizes delivery to account users who have varying levels of intent and onsite engagement
- Optimize for:
- Clicks: optimizes delivery to account users more likely to click on your ad
- Visits: optimizes delivery to account users more likely to visit any tagged page on your site
- Reach: optimizes delivery across all account users
- Under each funnel, click + Add Ad Group
- Assign creative sets tailored to the corresponding funnel level
- Note: When adding ad groups to creative library, consider names that correlate to their corresponding funnel levels
- Input total budget
- Pick an ad plan
- Use Check Budget to activate Campaign Checker
- Review projected reach, spend, impressions, domains reachable
- Confirm budget supports ~2,500–3,000 impressions/account/month
- For each funnel stage, assign account bid priority (Standard / More / Most)
- Use Campaign Overview to review setup
- Inspect Funnel Configuration to ensure correct creative allocation
- Download Tear Sheet of creative across funnels
- Once confirmed, Publish Campaign
Step 2: Journey Targeting
Step 3: Add Ad Groups
Step 4: Media Planning
Step 4a: Bid Priority Allocation
Step 5: Review & Publish
Part 7: Reporting, learning & handoff
- Track campaign metrics: Reach, Visited, Clicks, Lift, New Onsite
- Connect journey progression to pipeline outcomes
- Surface accounts that cross thresholds to Sales
- Sync account progression across channels
The results
When executed correctly, you can expect:
- A single, orchestrated campaign delivering dynamic experiences across stages
- A smoother, more aligned buyer journey (trust → engagement → validation → growth)
- Efficiency gains—no more juggling separate campaigns and manual budget adjustments
- Clear insights: journey progression, creative impact, account-level performance
- Stronger collaboration between Marketing and Sales, with aligned insights and activations
- Impact on pipeline and revenue attribution drawn directly through journey paths
Partner with Demandbase Experts
Get tailored strategies and insights to optimize your approach, drive engagement, and unlock new opportunities.
More Playbooks
Engagement points for G2 intent
Learn how to assign Engagement Points to G2 intent signals for smarter scoring, stronger buyer insights, and better alignment between Marketing and Sales.
Learn how to track sales touches by persona in Demandbase. Optimize sales outreach by targeting the right personas at the right time.
How to find top competitive intent keywords
Learn step-by-step how to identify top competitive intent keywords using Demandbase's tools. Gain insights to uncover competitor signals and boost your GTM strategy.
We have updated our Privacy Notice. Please click here for details.